Hover DNS Setup For ImprovMX
1. View and copy your MX & SPF records
Where to find your MX & SPF records in the ImprovMX dashboard : Viewing MX & SPF records
You will be required to copy them into Hover.
2. Add MX records
In Hover, navigate to the Control Panel page. Locate your domain and click on it. Then, click on "DNS".

Select "Add a record" and fill in the fields as follows:
- Type - MX
- Hostname - @
- Priority - 10
- Mail Server -
mx1.improvmx.com
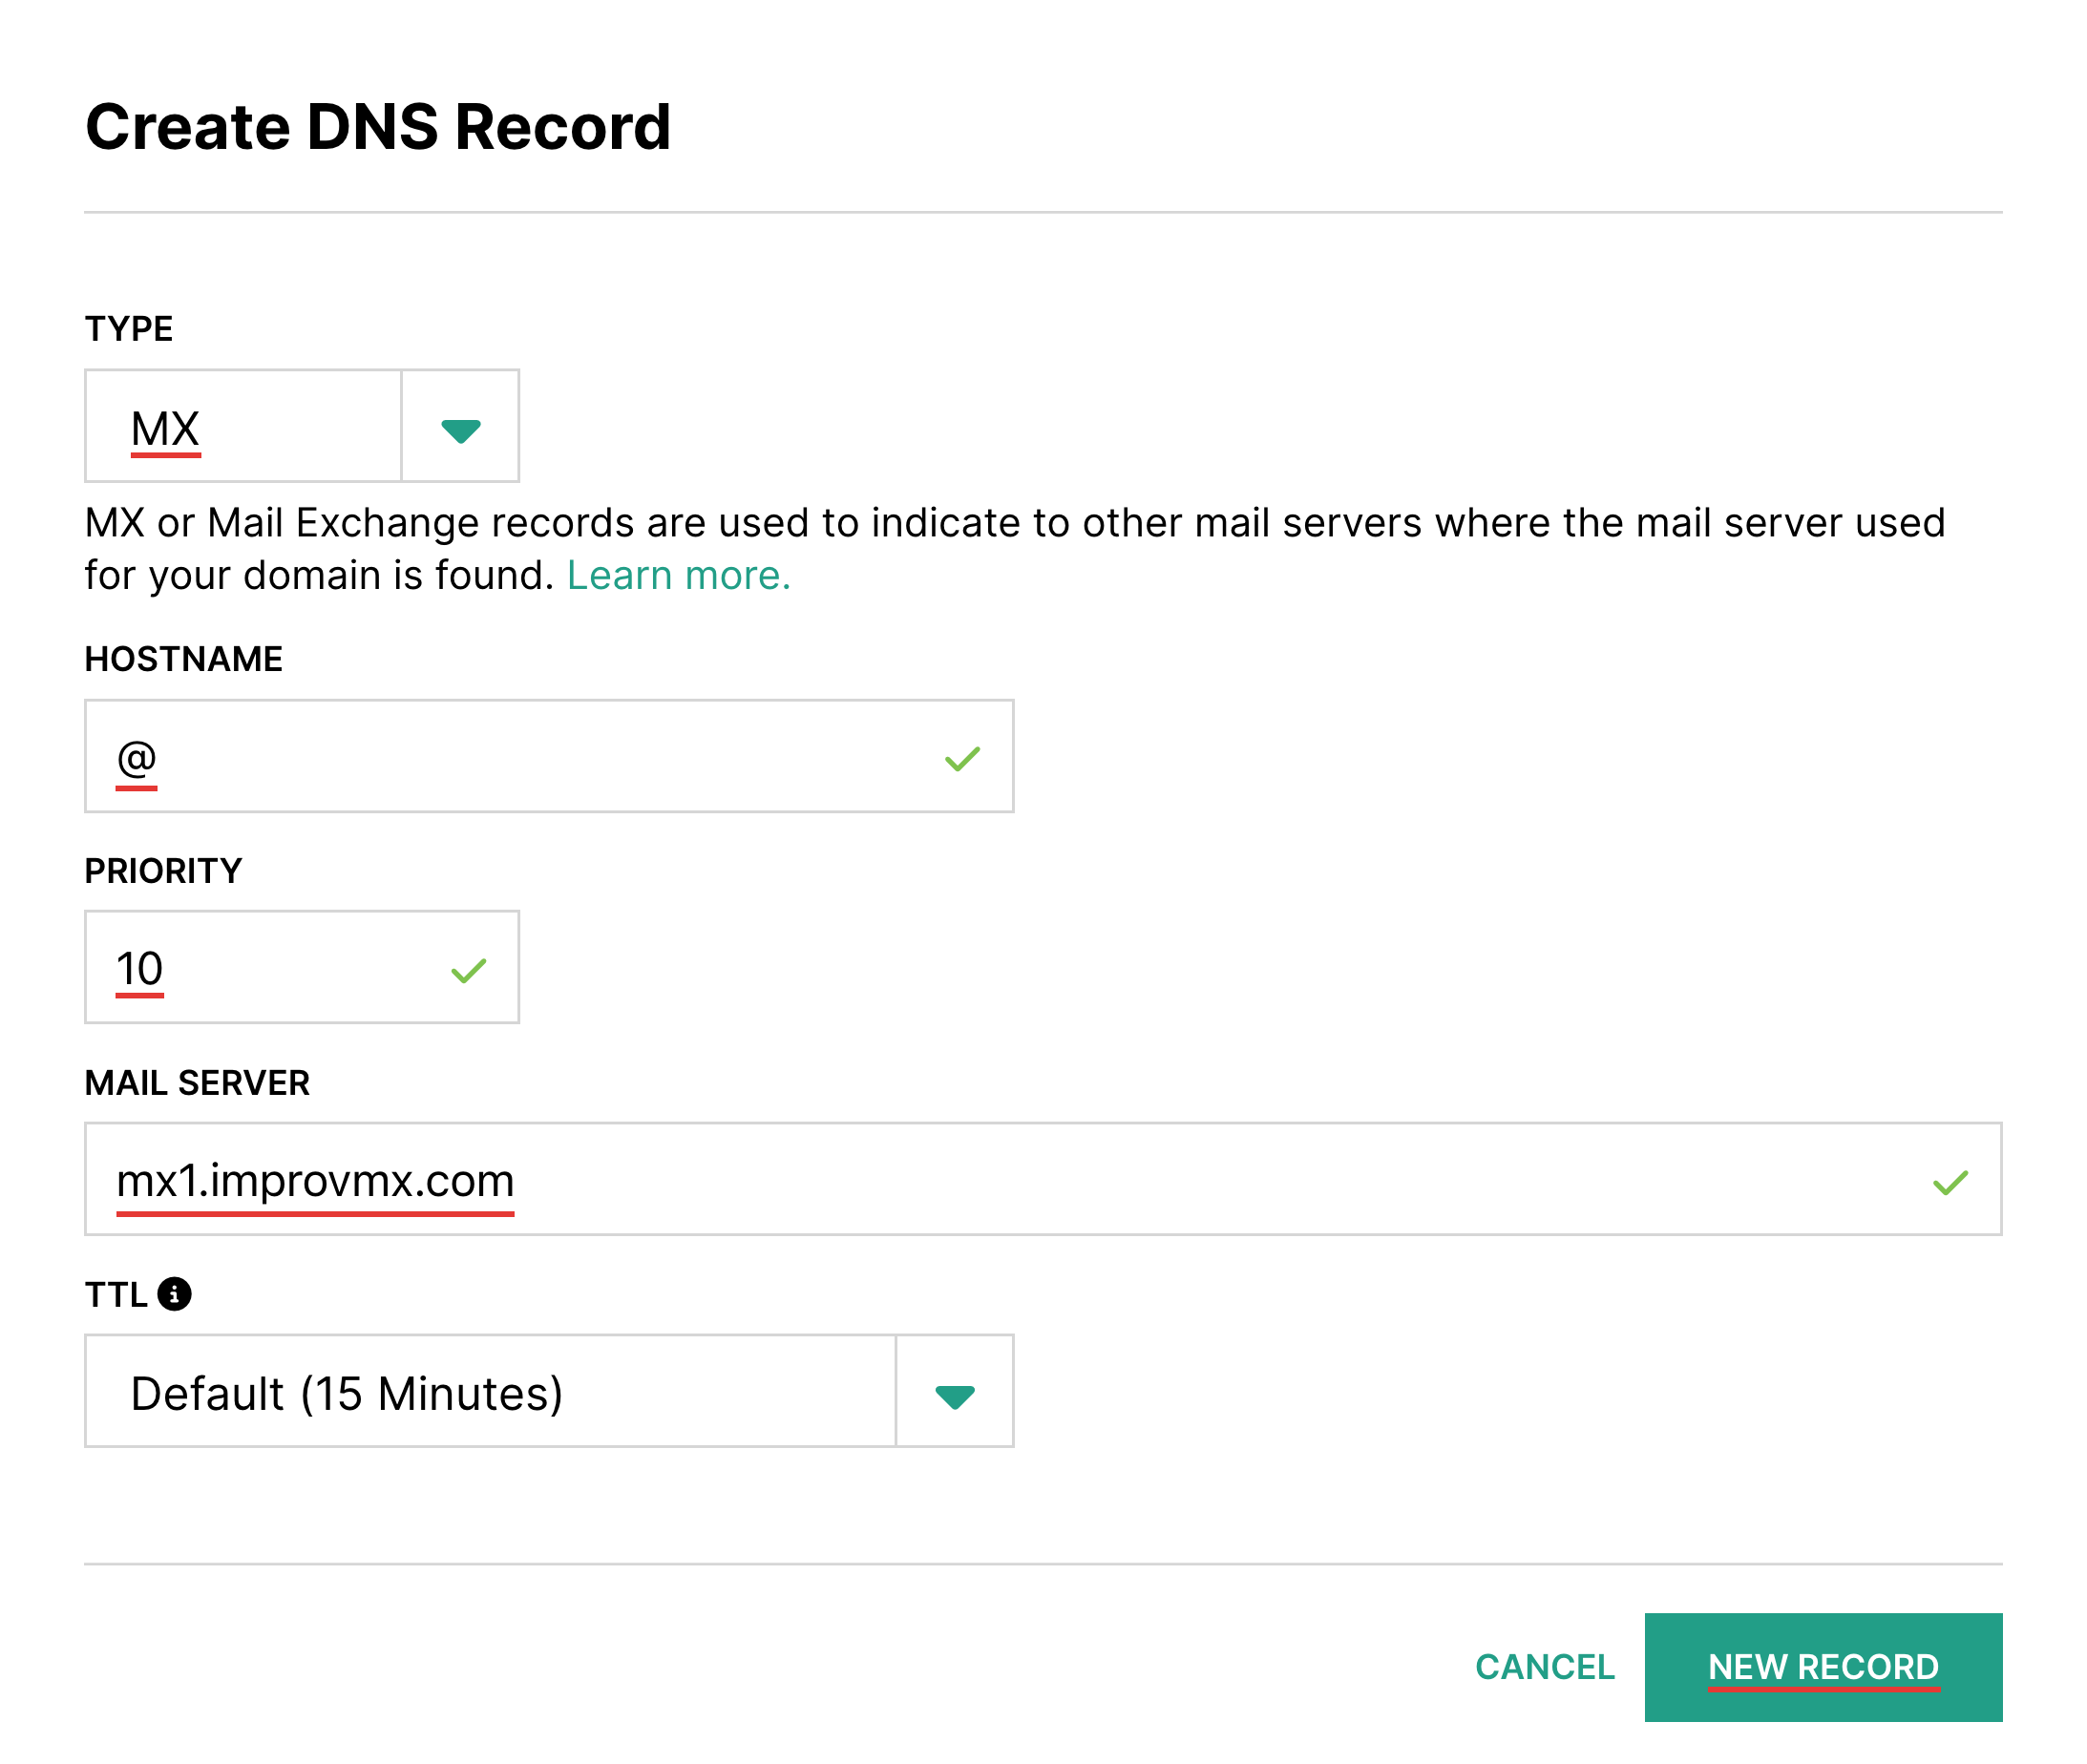
Click "New Record". Repeat for the second MX record but:
- Priority - 20
- Mail Server -
mx2.improvmx.com
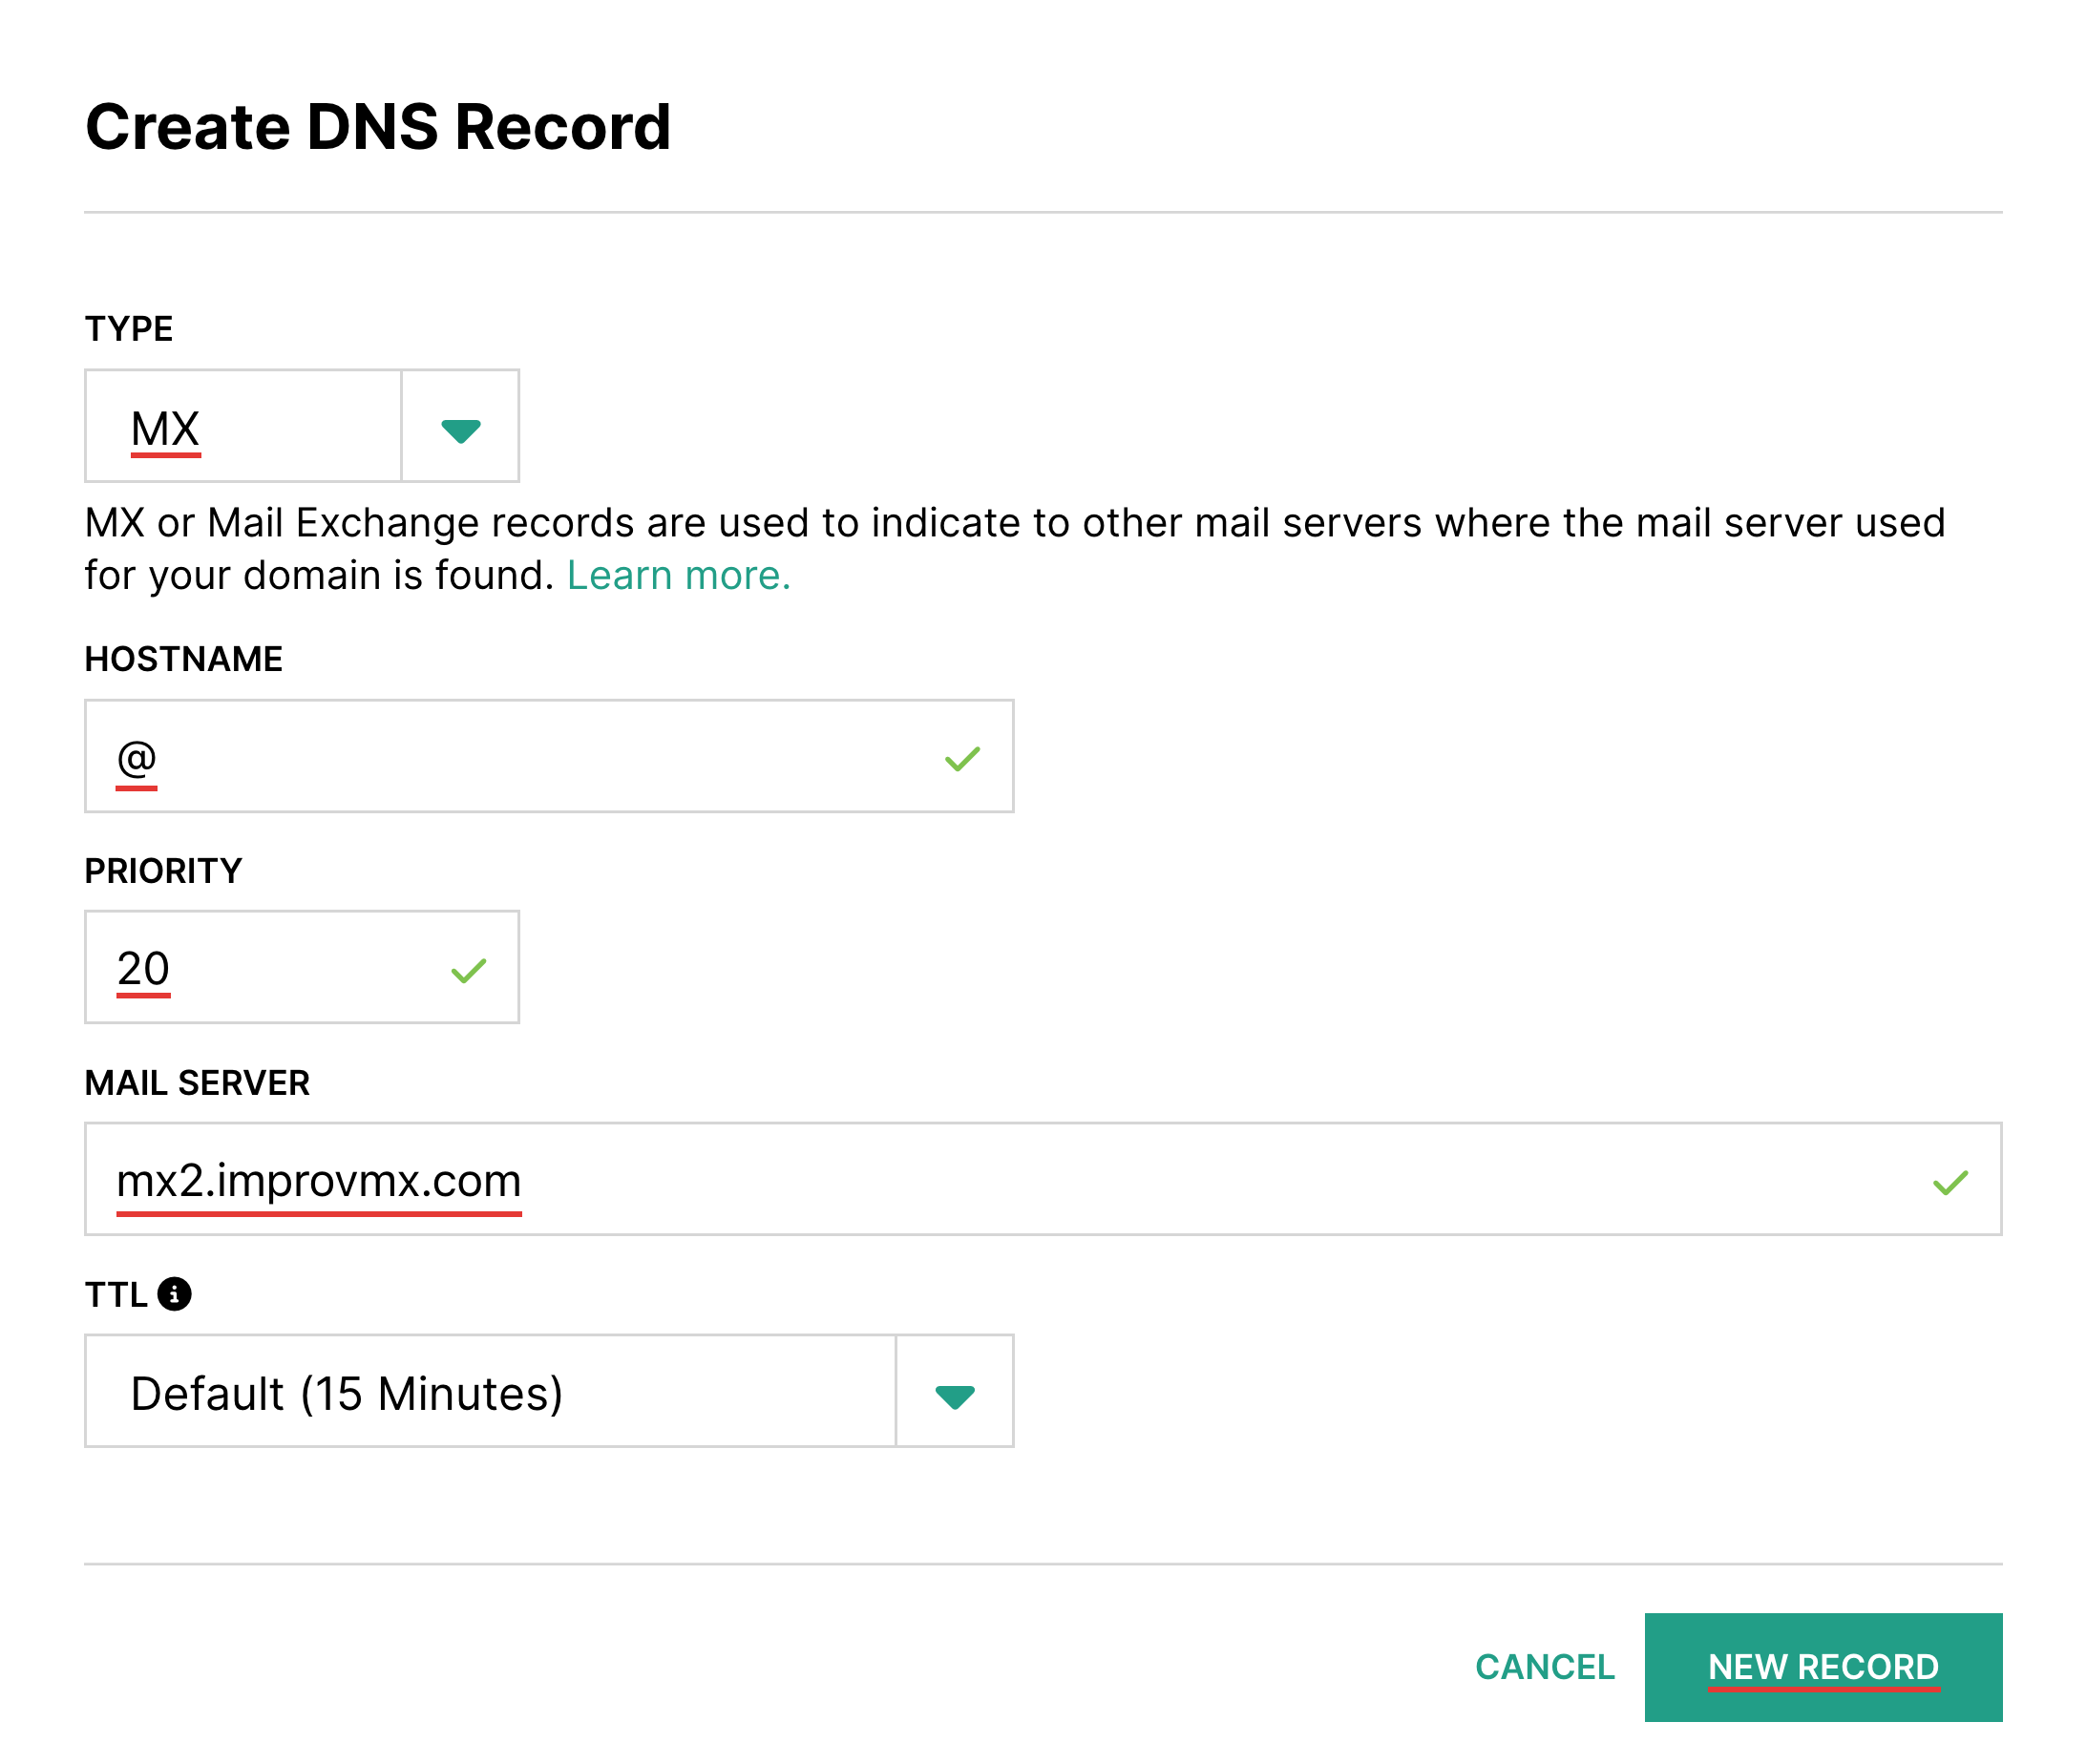
Click "New Record"
3. Add SPF Record
In the ImprovMX dashboard, find the SPF Records section and copy "Recommended Value".
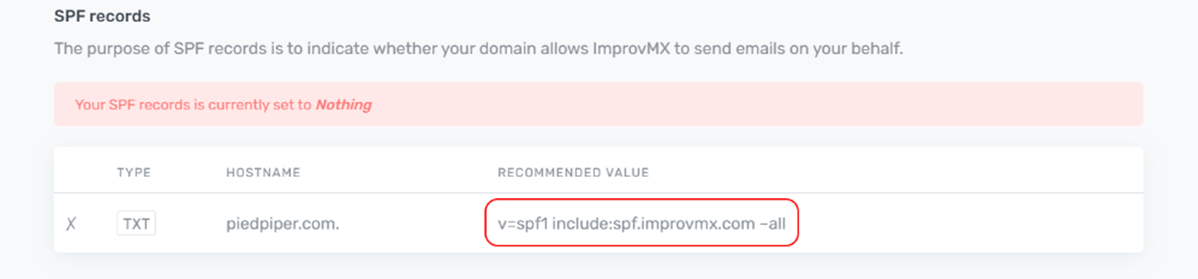
In Hover, select "Add a record". Fill in the record fields as follows:
- Type - TXT
- Hostname - @
-
Content -
v=spf1 include:spf.improvmx.com ~all(or your recommended value)
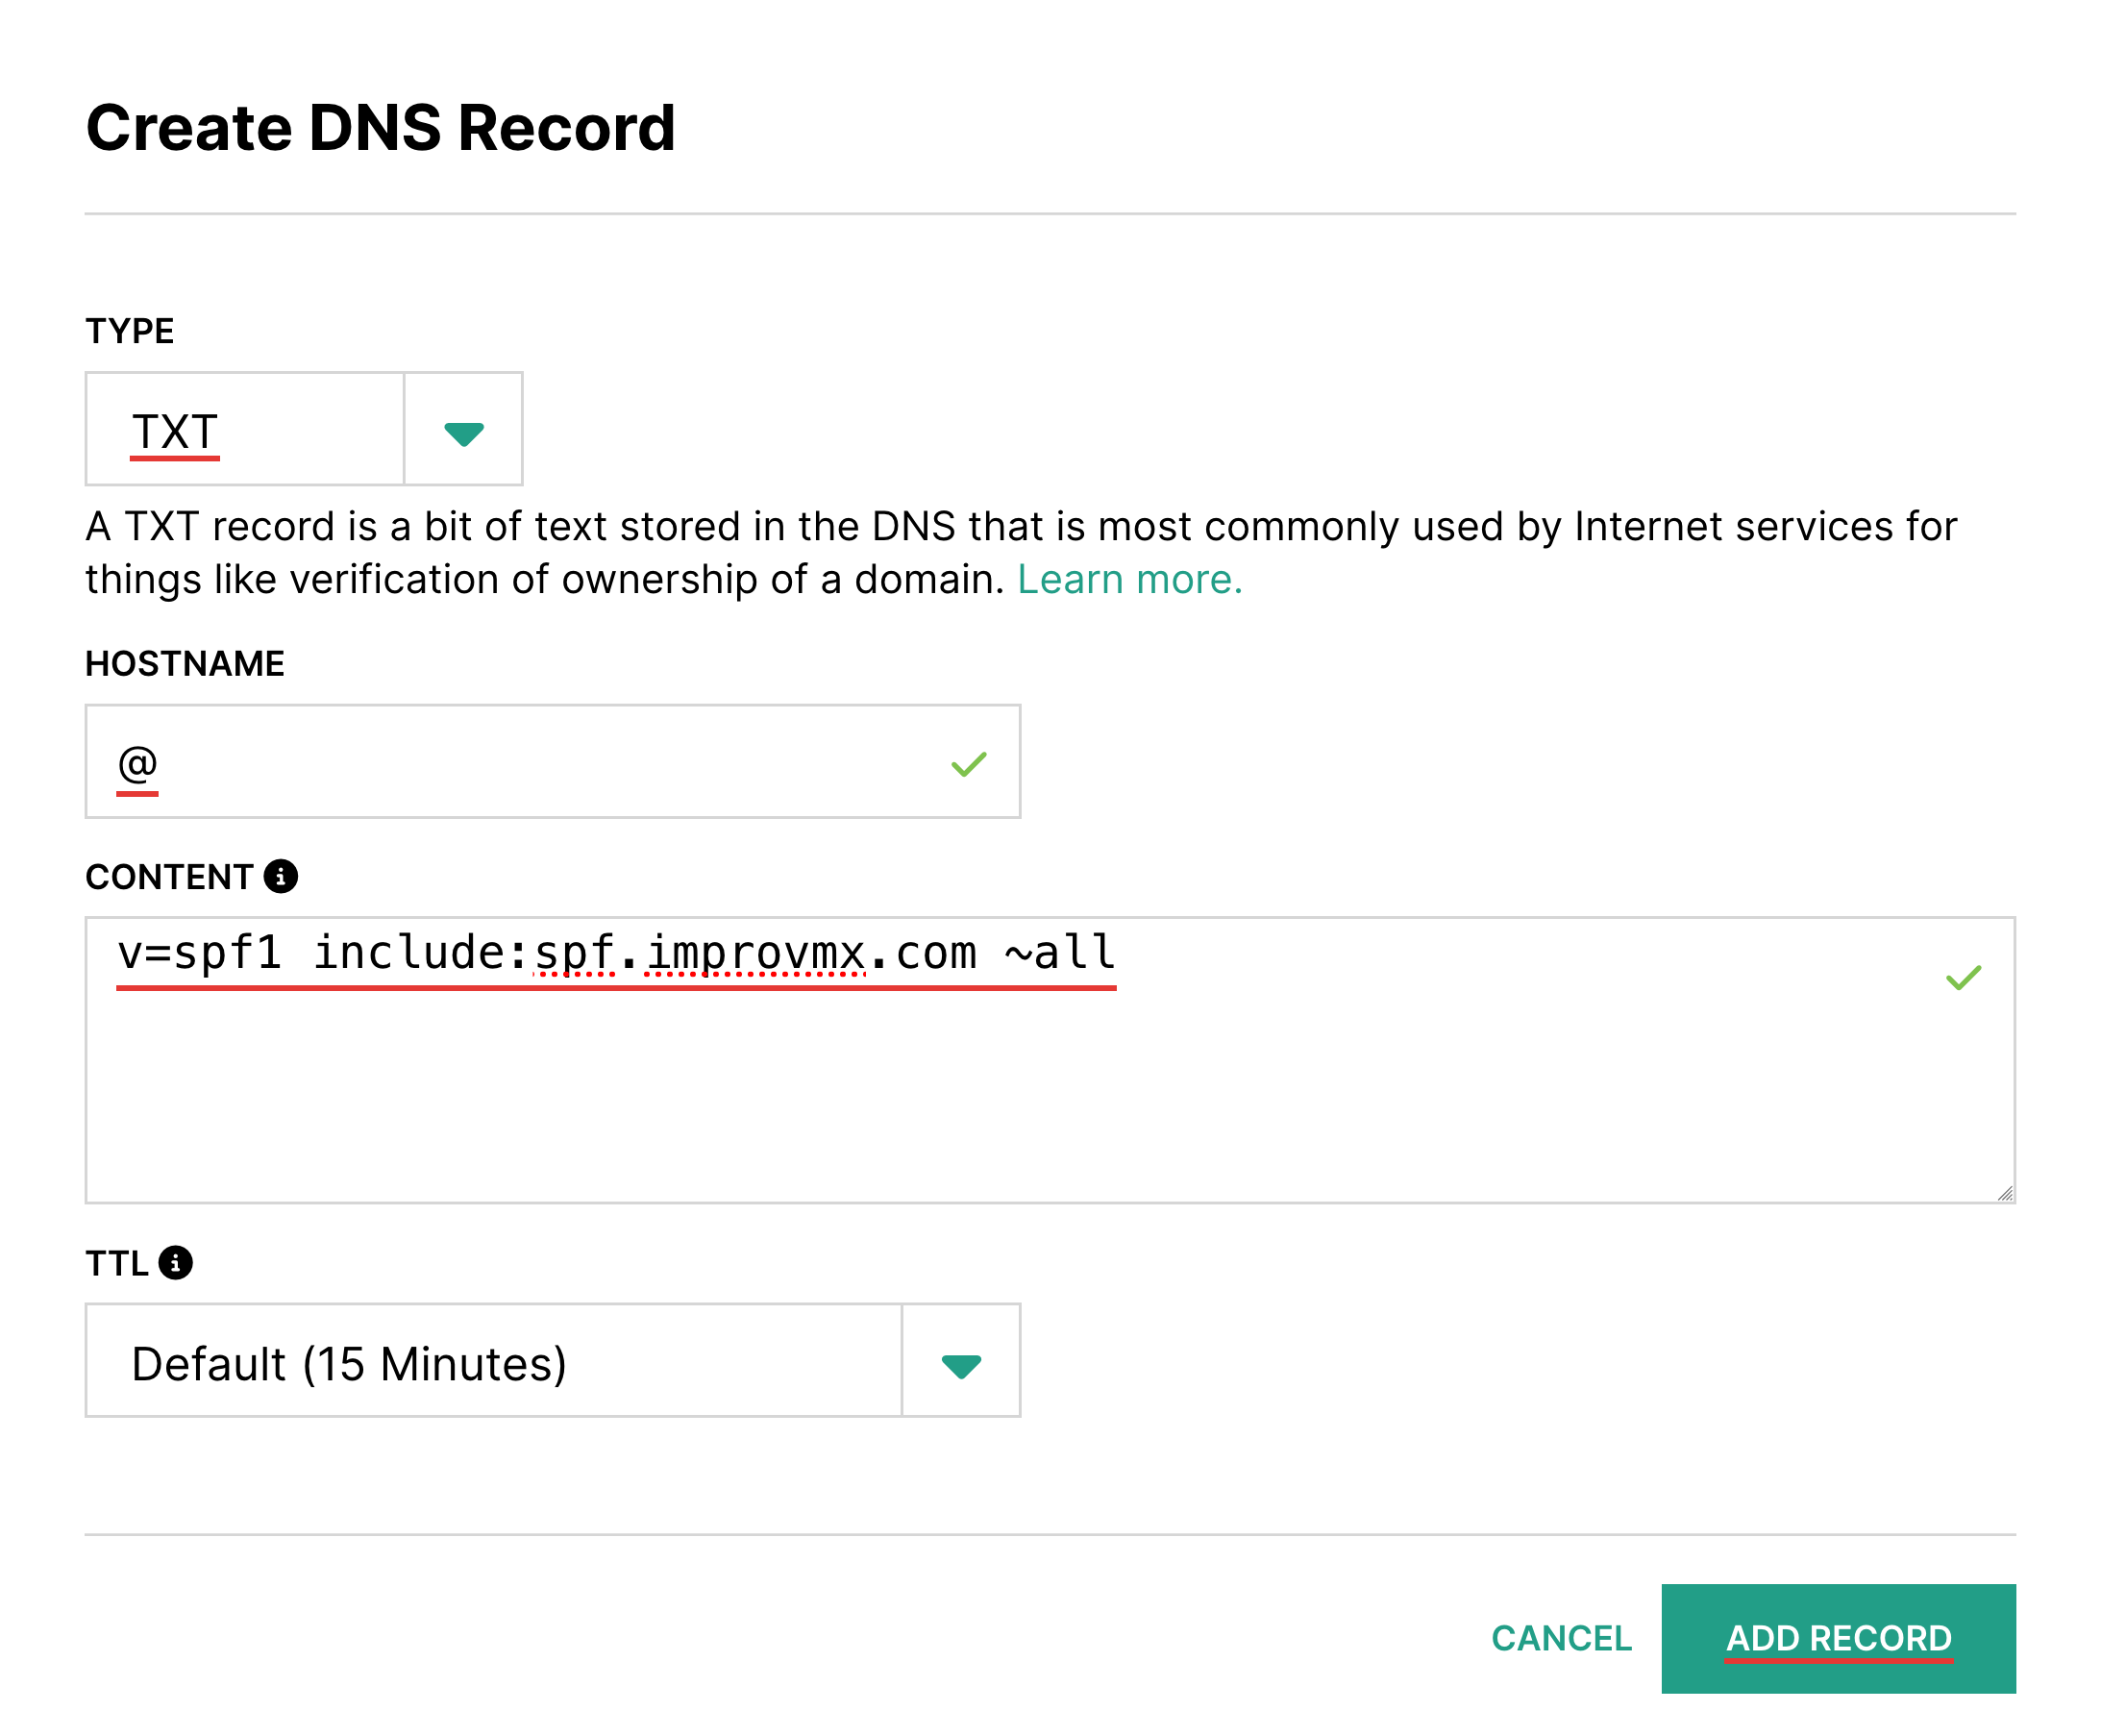
Click "Add Record"
4. Verification
That's it! DNS changes can take up to 24-48 hours to propagate, but usually happen sooner. We'll notify you once detected. You can also click 'Check Again' on the ImprovMX dashboard to see if it's updated.
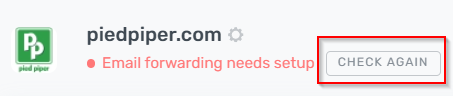
Domain will display "Email forwarding active" once DNS changes have propagated.

Still have questions? Feel free to reach out to our support team!