Sending emails using Gmail's "send mail as"
This feature relies on an older Google functionality that could be discontinued at any time. It also lacks proper email authentication (SPF, DKIM, and DMARC), which many mail providers now require. As a result, some providers - such as Yahoo - may reject messages sent this way entirely, while others may send them to spam.
Our premium plans include a custom SMTP service that avoids these issues.
1. Make sure you have 2FA enabled
For this method to work, you need to have two factor authentication enabled for your Google account. If not enabled, follow this link to set it up.
2. Create an App Password
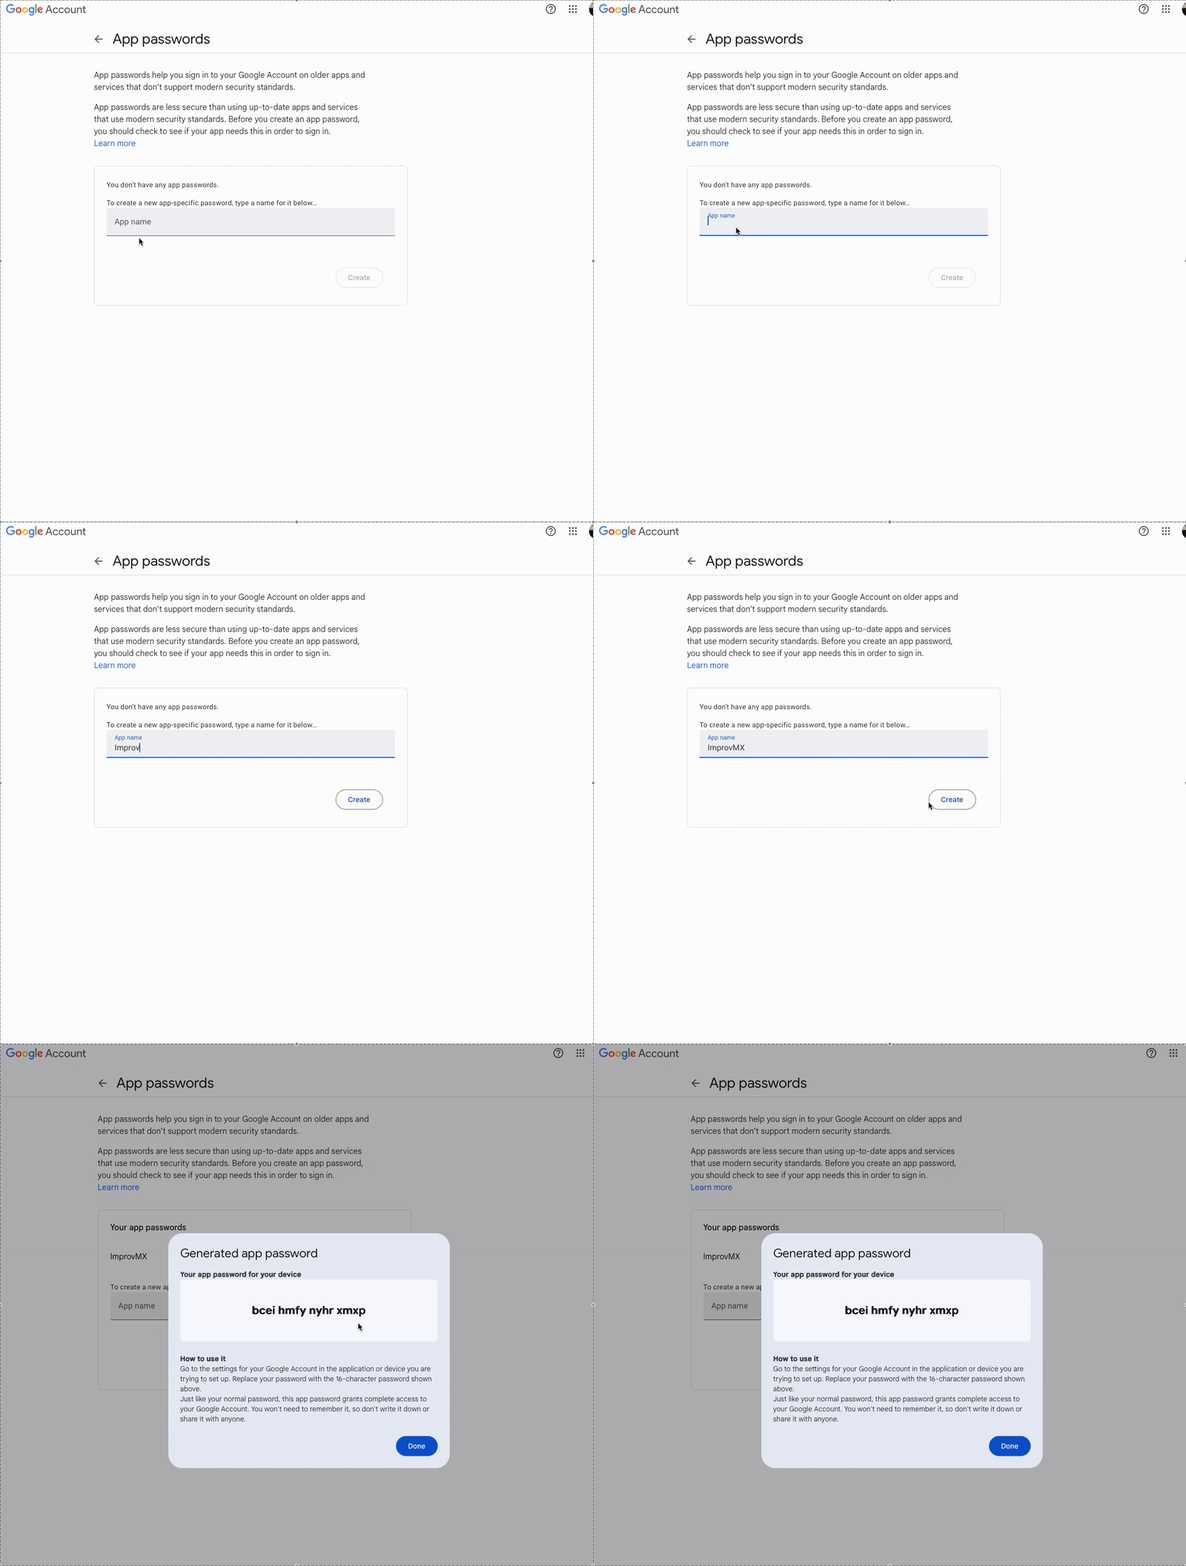
Use the following link to generate an app password. Enter ImprovMX as the name. Click "Create". Copy the code; you'll need it in step 5.

3. Add your email to Gmail
Go to Gmail -> Settings -> Accounts and Import. Then, select "Add another email address" under Send Mail As.
4. Configure sender information
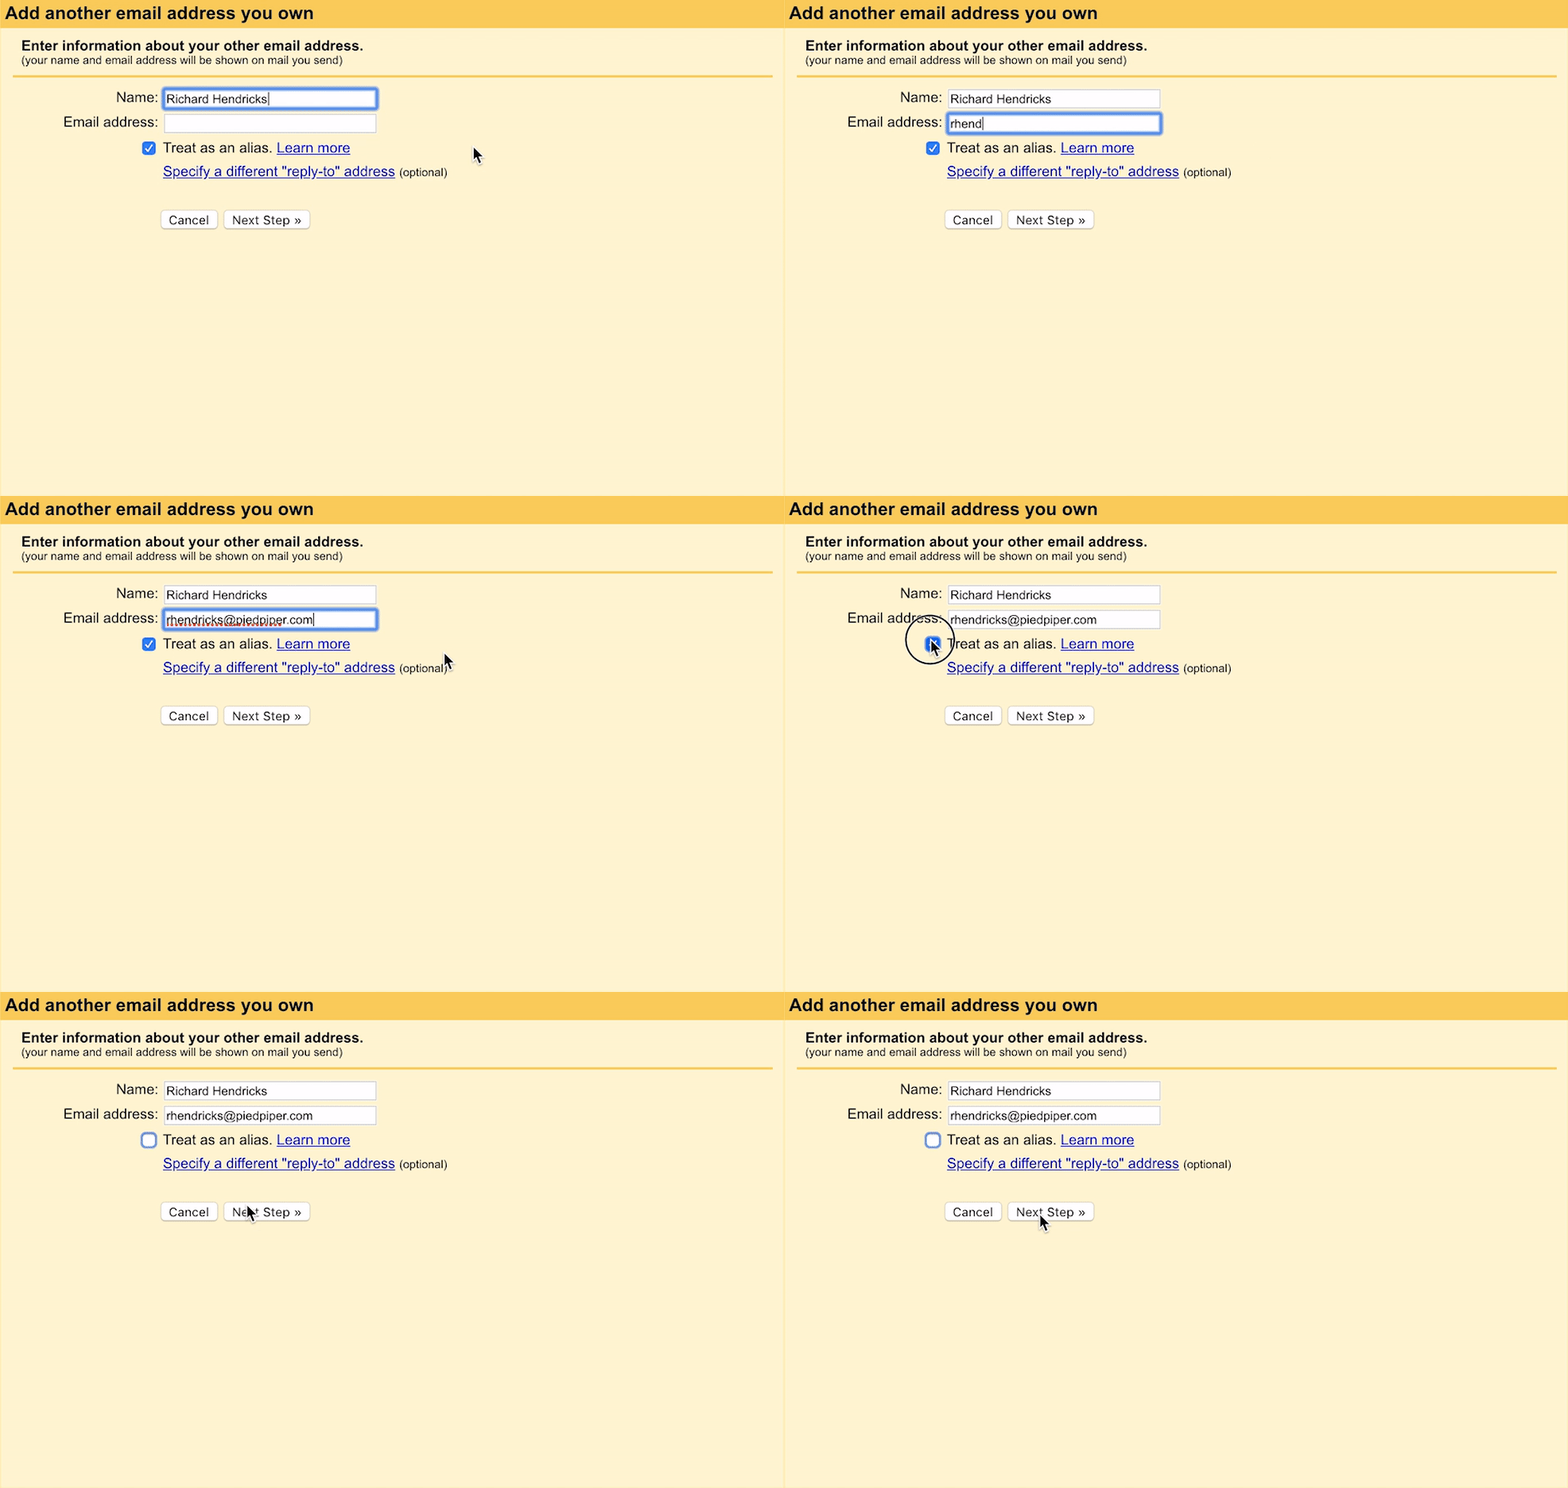
Set your forwarded email (your alias) and your sender’s name. Untick "treat as an alias".

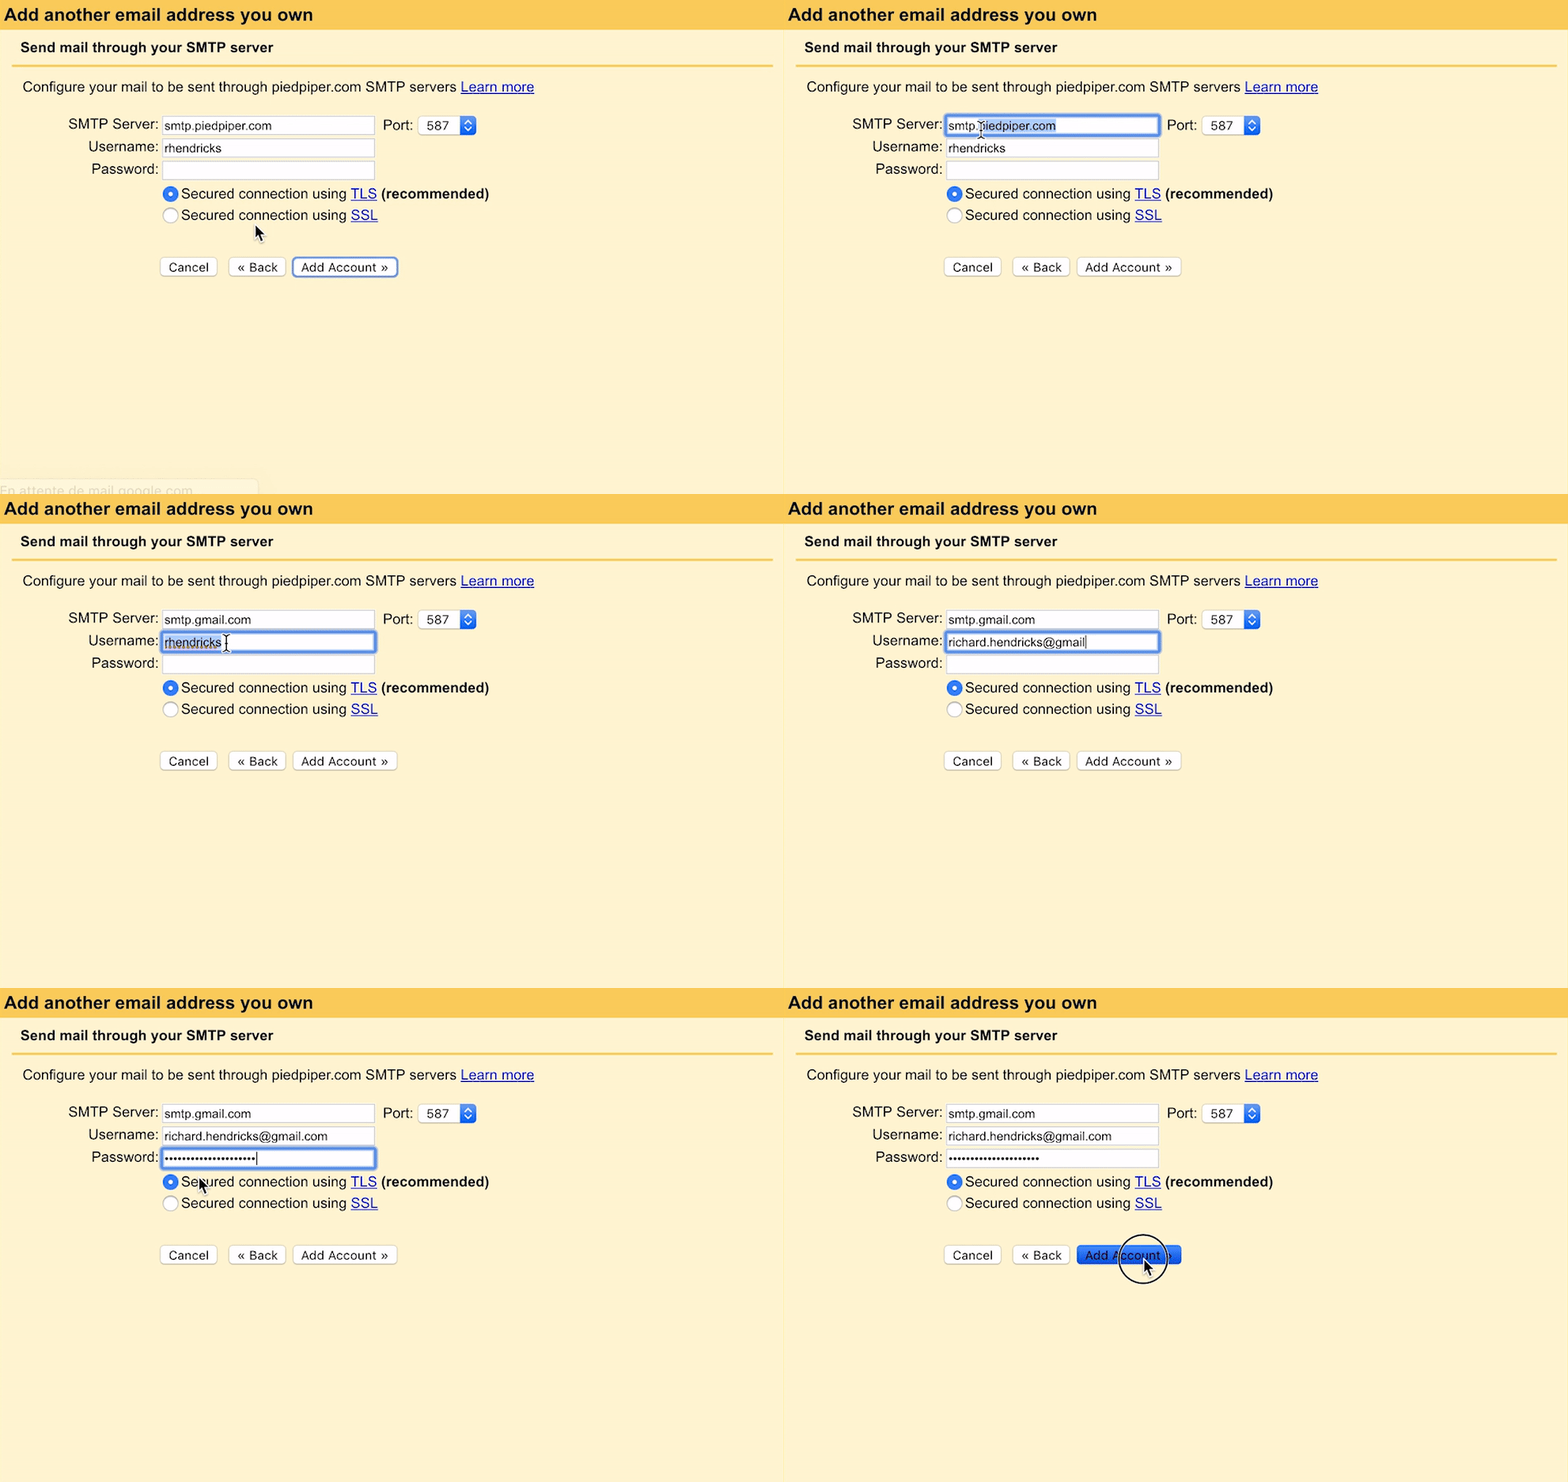
5. Enter SMTP settings
- SMTP server: smtp.gmail.com
- Port: 587
- Username: Your Gmail address (including @gmail.com).
- Password: the password you generated on Step 2.
- Leave TLS enabled as is.

6. Confirm ownership
You will receive an email from Gmail asking you to confirm ownership with a code. Open the link, click Confirm, and you are all set!
7. Send emails from your alias
Now you can select your alias in the From dropdown list when you compose a new message.
Troubleshooting FAQ
Why isn’t my alias working?
- Use
smtp.gmail.comwith your Gmail address and a Google App Password (not your Gmail password). - Try refreshing your browser, clearing cache, or switching to incognito mode.
Emails go to spam or show a warning
- Uncheck “Treat as an alias” (Step 4 in this guide)
- Avoid replying to your alias from the same Gmail you're forwarding to — this creates a mail loop.
- Ensure your SPF record is correct and has propagated (check with inspector.improvmx).
I click send, but nothing happens
- Gmail may block messages sent to your alias from the same Gmail account that you are forwarding to. Google detects a loop and drops the message. These show only in “Sent.”
- Try clearing your session or using another browser.
Why do my emails say “via Gmail” or “via ImprovMX”?
- The “via Gmail” label appears when using Googles "Send mail as" - it’s not removable.
- To avoid this, use ImprovMX SMTP (available to paid users).
- If your email says “via ImprovMX,” double-check the alias isn’t marked as “treat as alias.”
Still stuck?
Google's "Send mail as" is an old, unsupported feature. It may stop working in the future, and we offer limited support for it. For better reliability, we recommend switching to ImprovMX SMTP.