Apple Mail (MacOS) with ImprovMX SMTP
How to Send Mail from Your Custom Domain on macOS Mail Using ImprovMX SMTP (with Gmail for Incoming Mail)
If you're forwarding mail to a Gmail inbox and want to send from your custom domain ([email protected]) using ImprovMX SMTP, macOS Mail makes it difficult, but ultimately gives you the flexibility to configure this — as long as you don't use the Google auto-setup option.
This guide walks you through how to:
- Use Gmail IMAP to read forwarded messages
- Use ImprovMX SMTP to send as [email protected]
Prerequisites
Before you begin, make sure you have:
- Your domain set up in ImprovMX, forwarding to Gmail
- Created an SMTP Credential in the ImprovMX Dashboard
- Added DKIM records in DNS
- 2-Step Verification enabled on your Gmail account
- A Gmail App Password for use with IMAP - Generate one here
Step-by-step setup on macOS Mail
Step 1: Open Mail > Add Account
- Open the Mail app
- Go to Mail > Add Account
- Select Other Mail Account…
- Click Continue
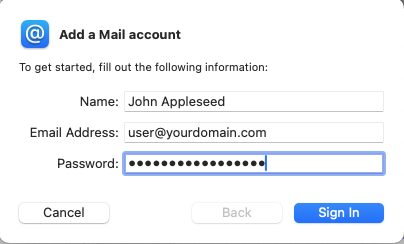
Step 2: Enter basic account info
- Name: Your display name
- Email Address: [email protected] (your ImprovMX alias)
- Password: Your Gmail App Password
Click Sign In — it will likely say it can't verify the account. That's fine.
Step 3: Enter mail server details
- Email Address: [email protected] (your ImprovMX alias)
- Username: Your Gmail Email Address
- Password: Your Gmail App Password
- Account Type: IMAP
- Incoming Mail Server: imap.gmail.com
- Outgoing Mail Server: smtp.improvmx.com
Click Sign In - it will again likely say it's unable to verify the account name or password. Don't worry, we'll fix it later - it will allow you to proceed by clicking Next.

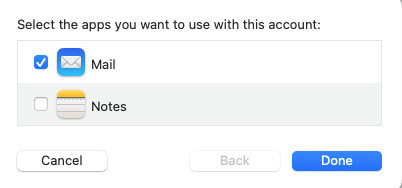
Step 4: Finalize account setup
- Choose which apps to use — leave only Mail checked
- Click Done
You now have a working IMAP account with Gmail as the backend — but some further tweaks will be needed to make sending work.
Step 5: Adjust outgoing settings
To ensure ImprovMX SMTP is configured correctly:
- Go to Mail > Settings
- Go to the Accounts tab
- Select the account you just added, and choose the Server Settings tab.
- Leave Incoming Mail Server (IMAP) settings as they are, and under Outgoing Mail Server (SMTP), fill in the following:
- Account: Leave as default - this should match the account you've just created
- Username: [email protected] (your ImprovMX SMTP credential username)
- Password: Your ImprovMX SMTP credential password
- Host Name: smtp.improvmx.com
- Uncheck: Automatically manage connection settings
- Port: 587
- Check: Use TLS/SSL
- Authentication: Password
- Click Save, then close settings.

Step 6: Send a test message and re-enter SMTP password
- Compose a new email
- Make sure the From field shows your ImprovMX alias (e.g. [email protected])
- Send a test message to another address you own. After several seconds, you may get a "Can't connect to account..." error - don't worry, enter your ImprovMX SMTP credential password one more time and click OK. You won't need to enter this the next time you send.
You're all set!
macOS Mail is now configured to:
- Send using your custom domain via ImprovMX SMTP
- Receive mail via Gmail IMAP (where your ImprovMX domain forwards)