GSuite legacy free edition alternative
Google just announced that they will discontinue the legacy free edition and force users to move to Google Workspace on May 1st, 2022. With ImprovMX, it is still possible to use Google services for free with a custom domain. There are some caveats, since you will need to setup individual Google accounts that won’t be tied to your organization, but… it works!
Any questions? We know that stuff can be hard. We offer free support – reach out!
1. Create free Google accounts for each of your users
To keep using G Suite for free, you’ll have to create free Google accounts for each of the users that you had under your G Suite free legacy edition account.
Be careful, this means that you won’t be able to transfer all the history you had with your current G Suite account, including any subscriptions you might have subscribed to, calendar invites or Google Play purchases.
2. Create a free ImprovMX account
Visit our homepage to create your account. Add the domain name you used on G Suite, and a primary redirection email we’ll use to manage your account. Don’t worry, you can create more aliases later.
Wondering how we can offer that for free? We’re charging for premium features like custom SMTP, Webhooks, or increased forwarding limits. We’re not selling any data, and all emails are instantly deleted after being forwarded – Read more about our email workflow.
3. Visit your domain registrar interface
MX records are set at your DNS provider which is usually the same as the domain registrar you’ve used to purchase your domain. We have more detailed documentation on how to set that up for the most popular registrars.
4. Delete previous GSuite "MX" entries
Delete all the previous “MX” entries you had registered for your DNS Zone in order to use G Suite legacy free edition. They should look like aspmx.l.google.com.
5. Add ImprovMX MX entries
Host  Value             Priority
@     mx1.improvmx.com  10
@     mx2.improvmx.com  20
6. Add ImprovMX SPF TXT entry
TYPE  HOST  VALUE
TXT   @     v=spf1 include:spf.improvmx.com ~all
7. Make sure you have 2FA enabled
For this method to work, you need to have two factor authentication enabled for your Google account. If not enabled, follow this link to set it up.
8. Create an App Password
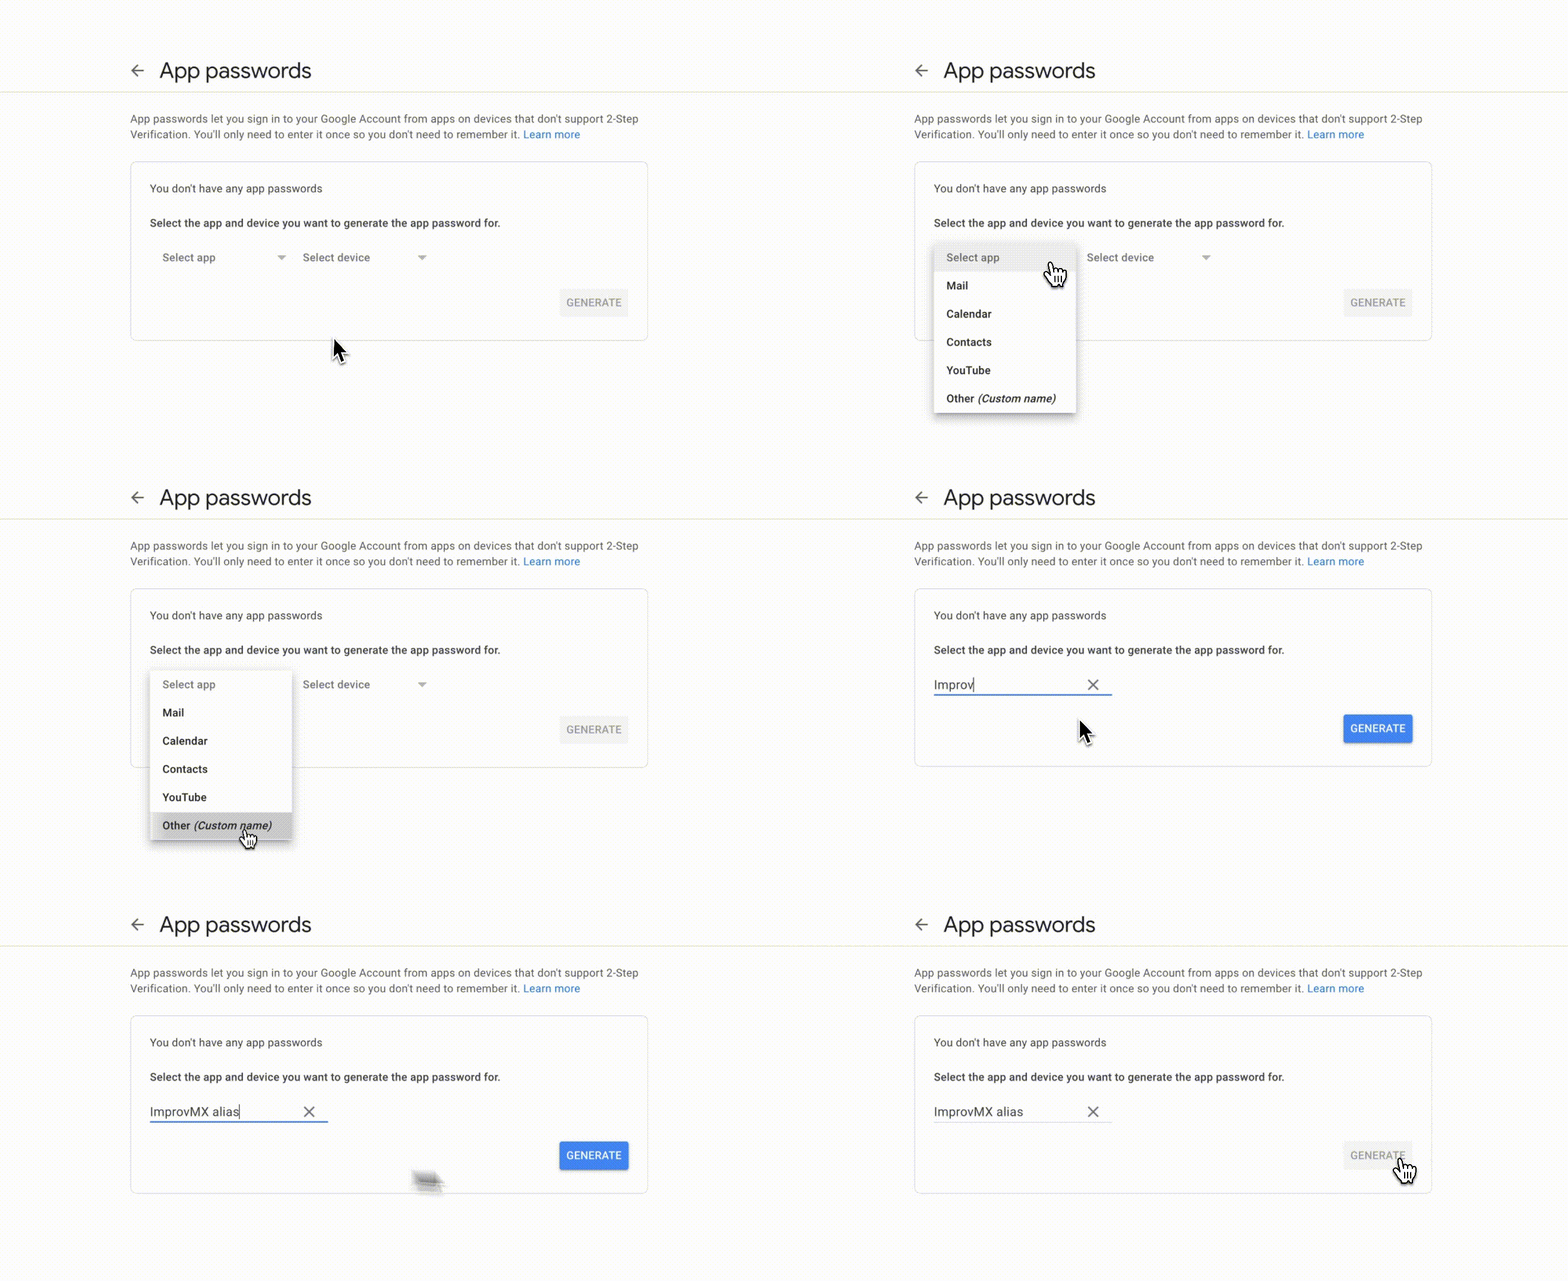
Google will verify your ownership with this app password. Select “Other (Custom name)” under app, and type “ImprovMX alias” as the name. Hit “Generate”. Copy and keep for later!

9. Add your email to Gmail
Go to Gmail -> Settings -> Accounts and Import. Then, select “Add another email address you own” under Aliases.
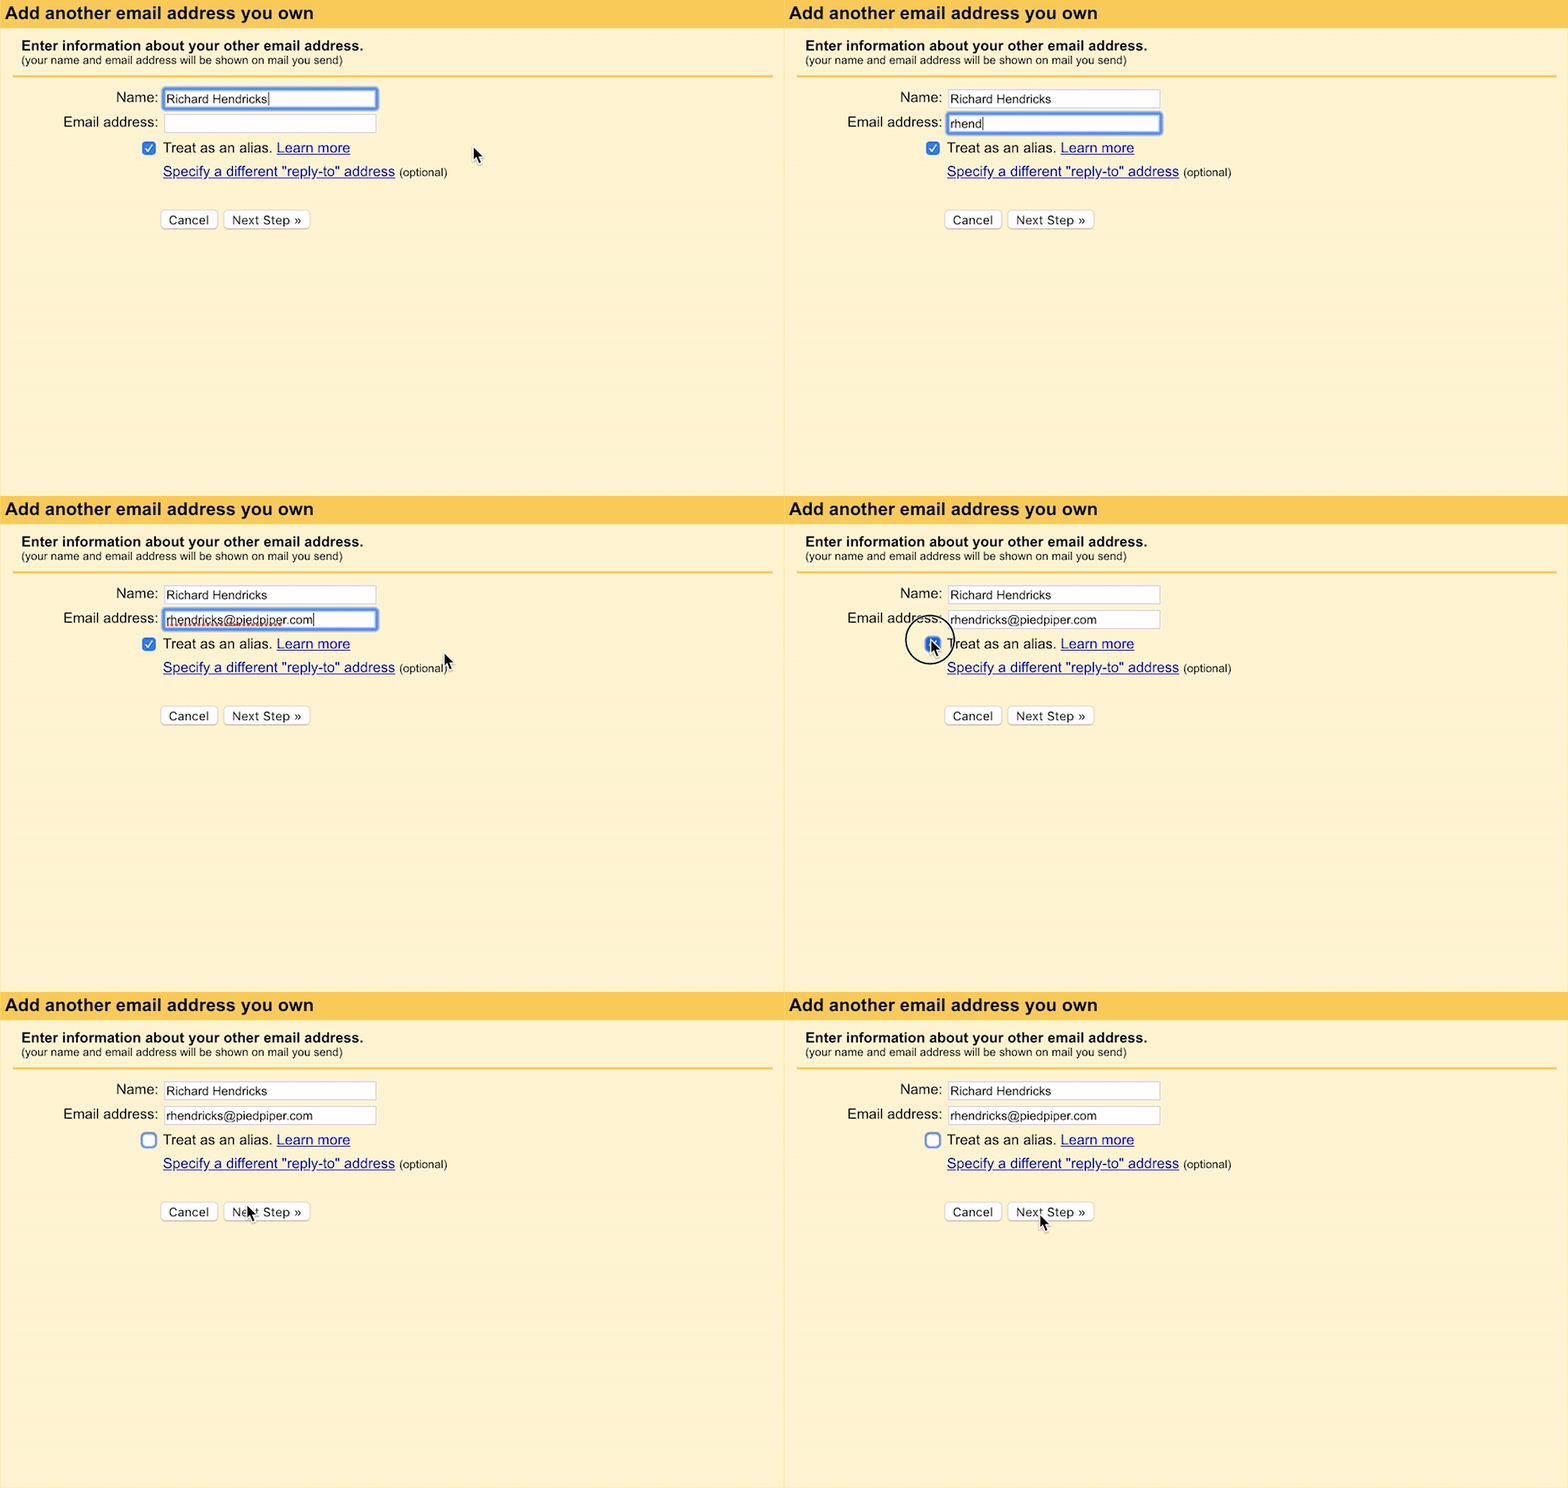
10. Fill in your sender’s information
Set your forwarded email (your alias) and your sender’s name. Untick “treat as an alias”.

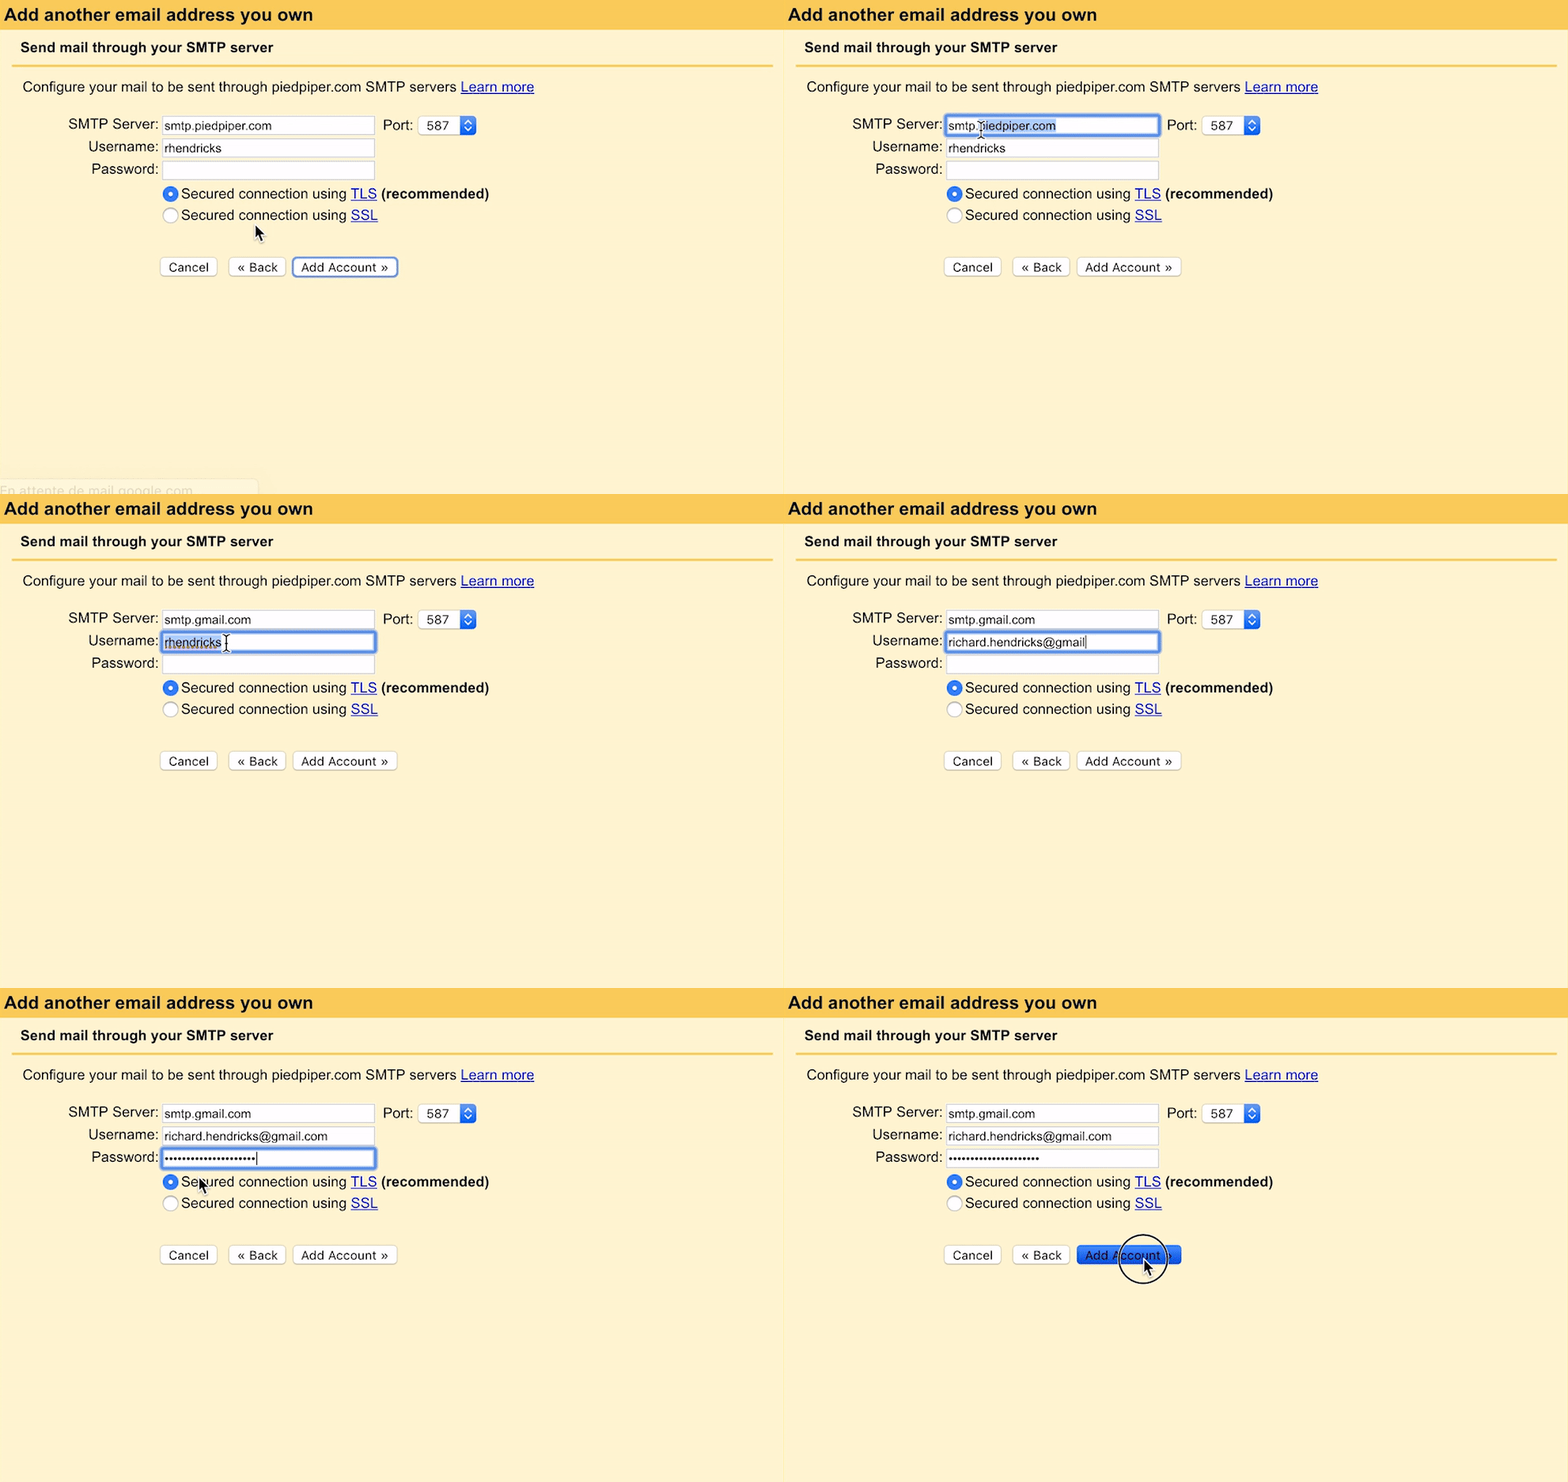
11. Fill in your email information
SMTP is smtp.gmail.com, port is right already.
Username is your gmail address (incl. @gmail.com)
Password is the password you generated on Step 2.
Leave TLS enabled as is.

12. Confirm ownership
You will receive an email from Gmail asking you to confirm ownership with a code. Open the link, click Confirm, and you are all set!
13. Send emails from your alias
Now you can just select your alias in the list when you compose a new message, and you are (almost) able to replicate what you had with G Suite, at least when it came to using a custom domain!