Netlify DNS Setup For ImprovMX
1. View Required DNS Records
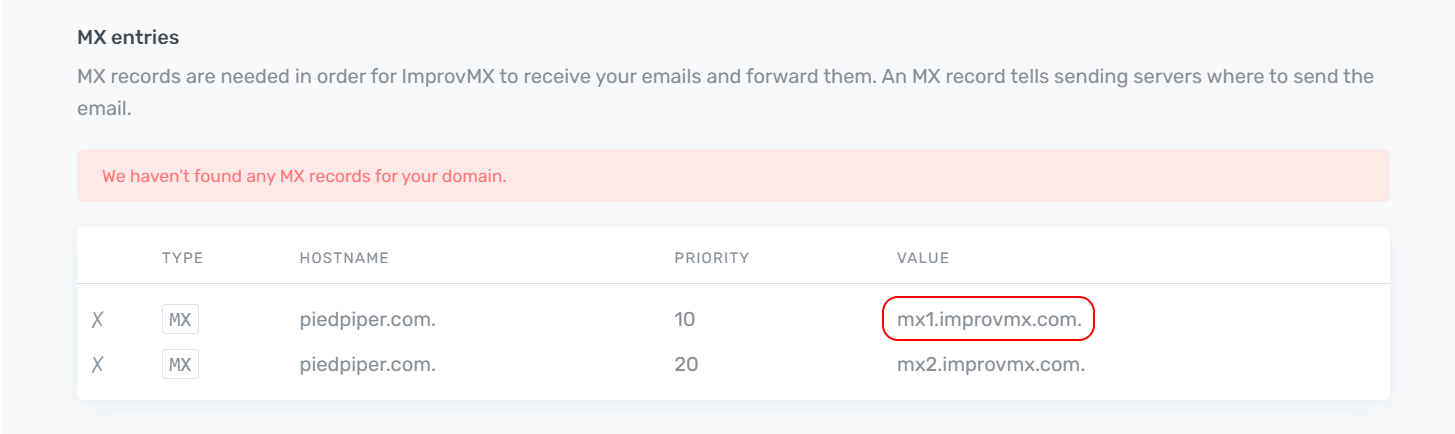
Go to your ImprovMX dashboard, locate your domain (this example uses pipedpiper.com
) and click to modify settings.

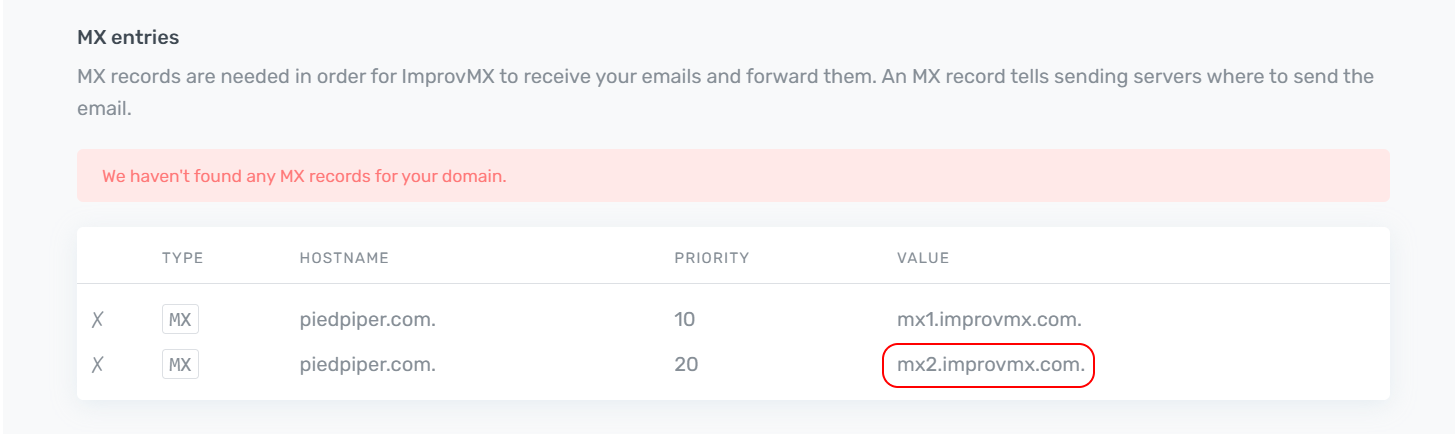
Scroll down to the MX entries section. This shows the two DNS MX records you will need to create on your DNS control panel. Click on the first value at the right hand side - this will copy it to the clipboard for use in the next step.
2. Set MX Records in Netlify
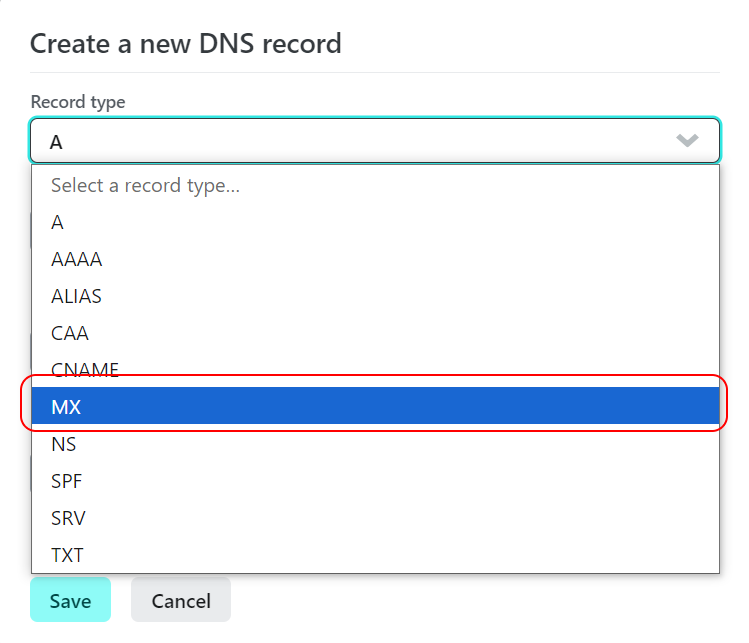
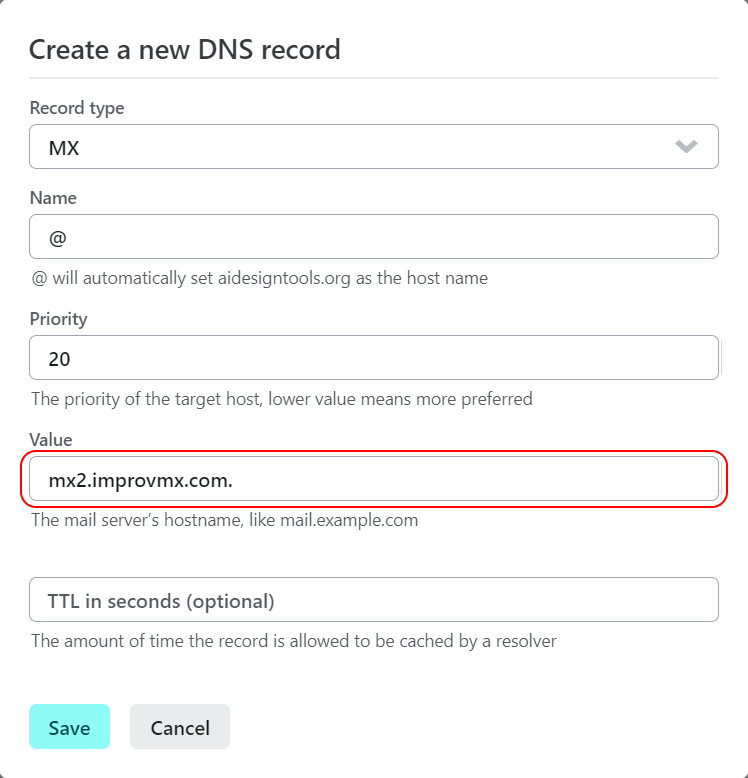
Go to your Netlify dashboard then go to Domains. Choose the domain you will be using with ImprovMX. Click the Add new record button.

Click the Record type dropdown. Then, choose MX from the dropdown. The Name field is automatically filled with a @. Leave that as is.
In the Priority field, enter 10.
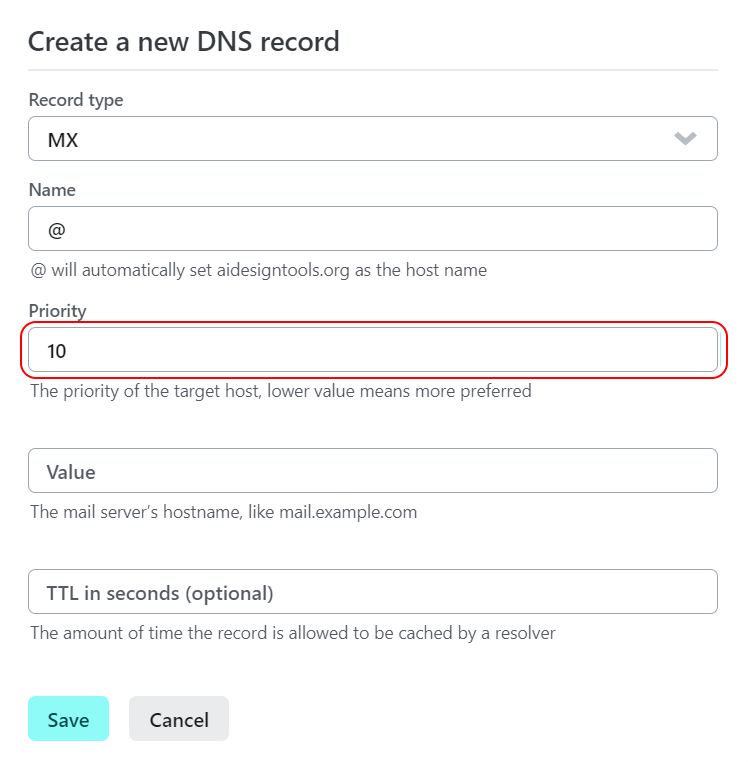
In the Value field, paste the value you copied to the clipboard earlier.
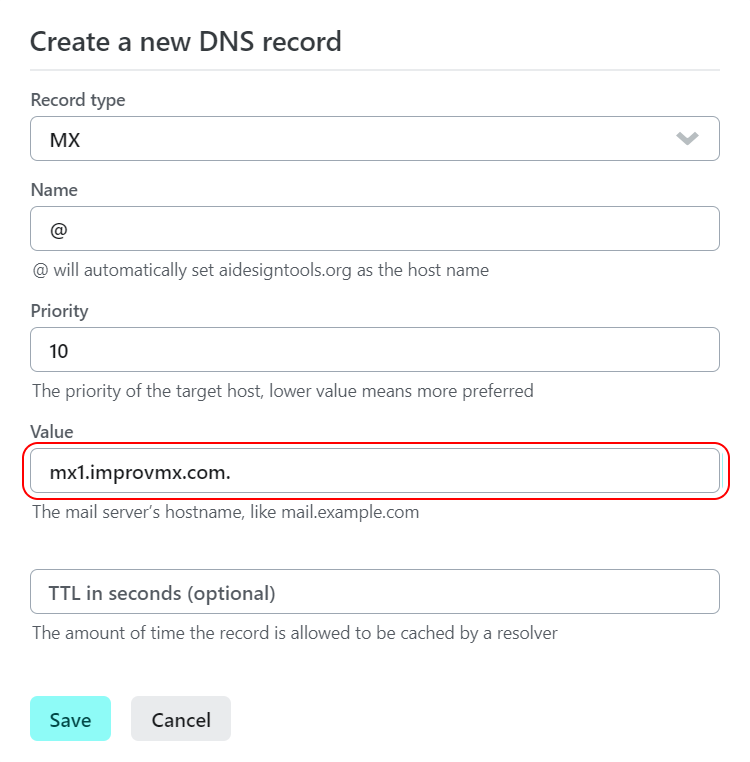
Click on the Save button.

Repeat for the 2nd MX record. For the 2nd record, the Record type and Name remains the same, while the Value is mx2.improvmx.com
and the Priority is 20.

3. Add an SPF Record
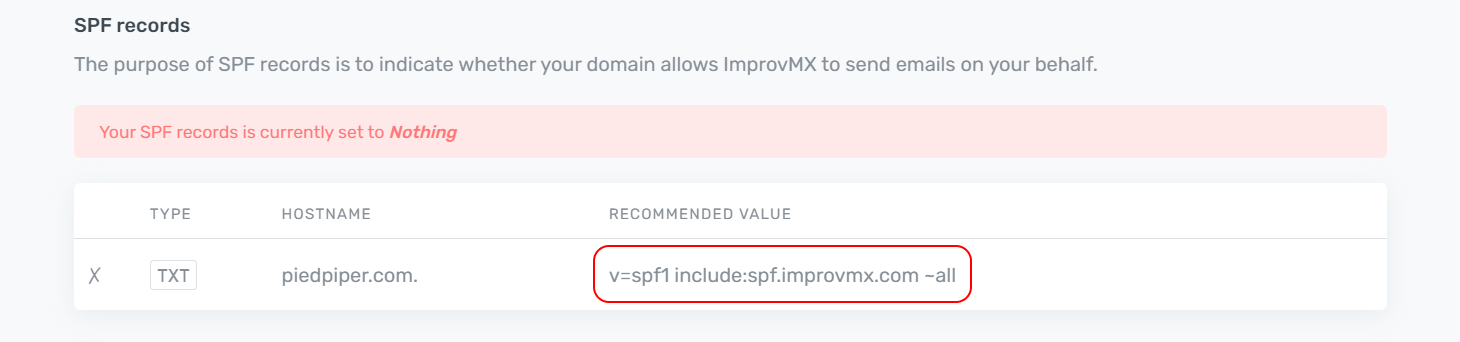
Go back to the ImprovMX dashboard and look for the SPF records section. Click the Recommended Value to copy it to the clipboard.
Go back to Netlify and click Add new record.

Click the Record type dropdown, but this time choose TXT from the dropdown.

The Name field will be autofilled with a @. Leave that as is. In the Value field, paste the SPF value you copied to the clipboard earlier.

Click on the Save button.

4. Verification
That's it! Now, you just have to wait for the DNS changes to propagate, which can take up to 48 hours, although normally much sooner. Once our system has detected the DNS changes, we'll notify you, and you'll be ready to go!
If you're feeling lucky you can try going back to the ImprovMX dashboard and clicking Check Again in case the changes are picked up straight away.
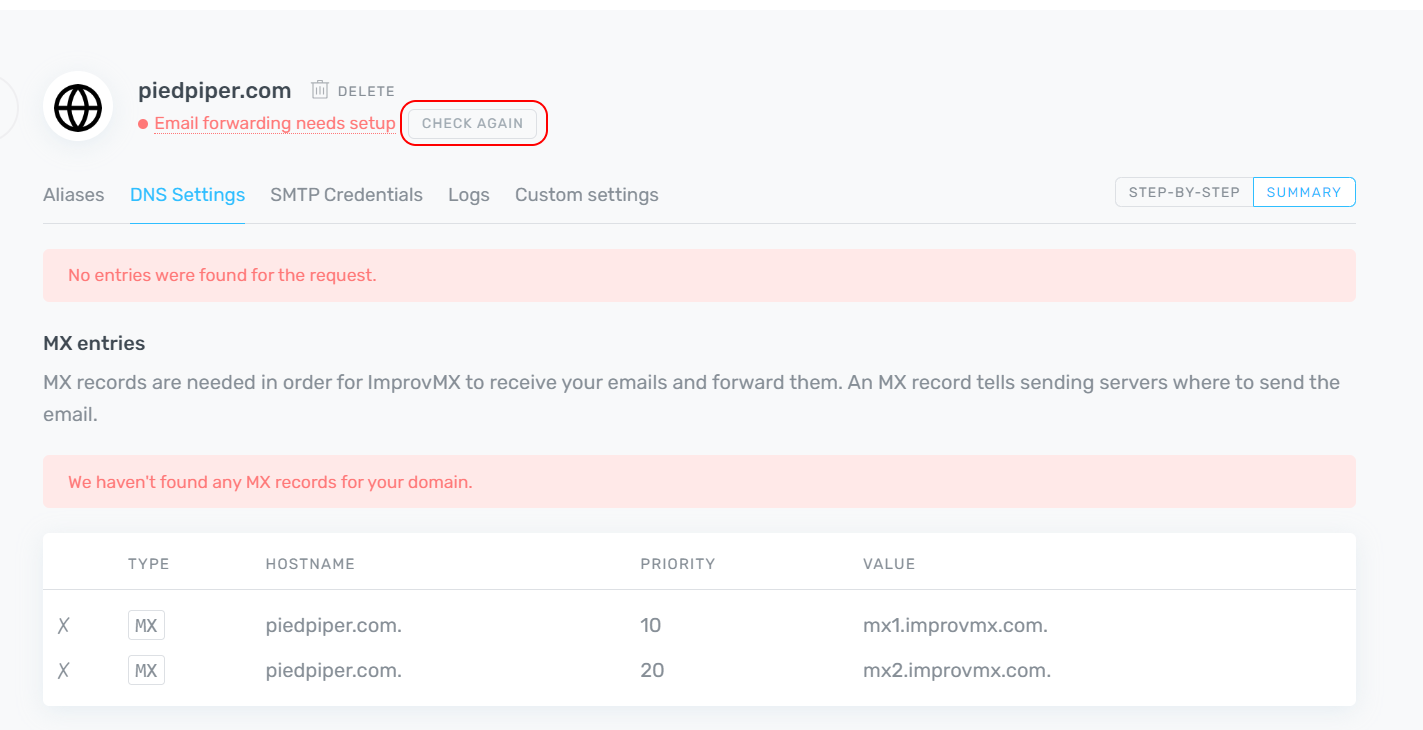
The domain will show Email forwarding active when the DNS changes have propagated successfully.